
This tutorial shows how to set up Clash Verge Rev on macOS to access the open internet, and how to route terminal traffic through the proxy — something the system proxy toggle alone does not handle.
Install Clash Verge
Clash Verge Rev is an open-source proxy client built on the Mihomo (Clash Meta) core. Install it with Homebrew:
brew install --cask clash-verge-revOr download the latest .dmg from the releases page.
Import a Subscription
You need a subscription URL from a proxy provider. The provider gives you a link to a config.yaml that contains the server nodes.
In Clash Verge, go to Profiles (订阅), paste the subscription URL, and click Import. The home page then shows your profile with usage and expiration info.
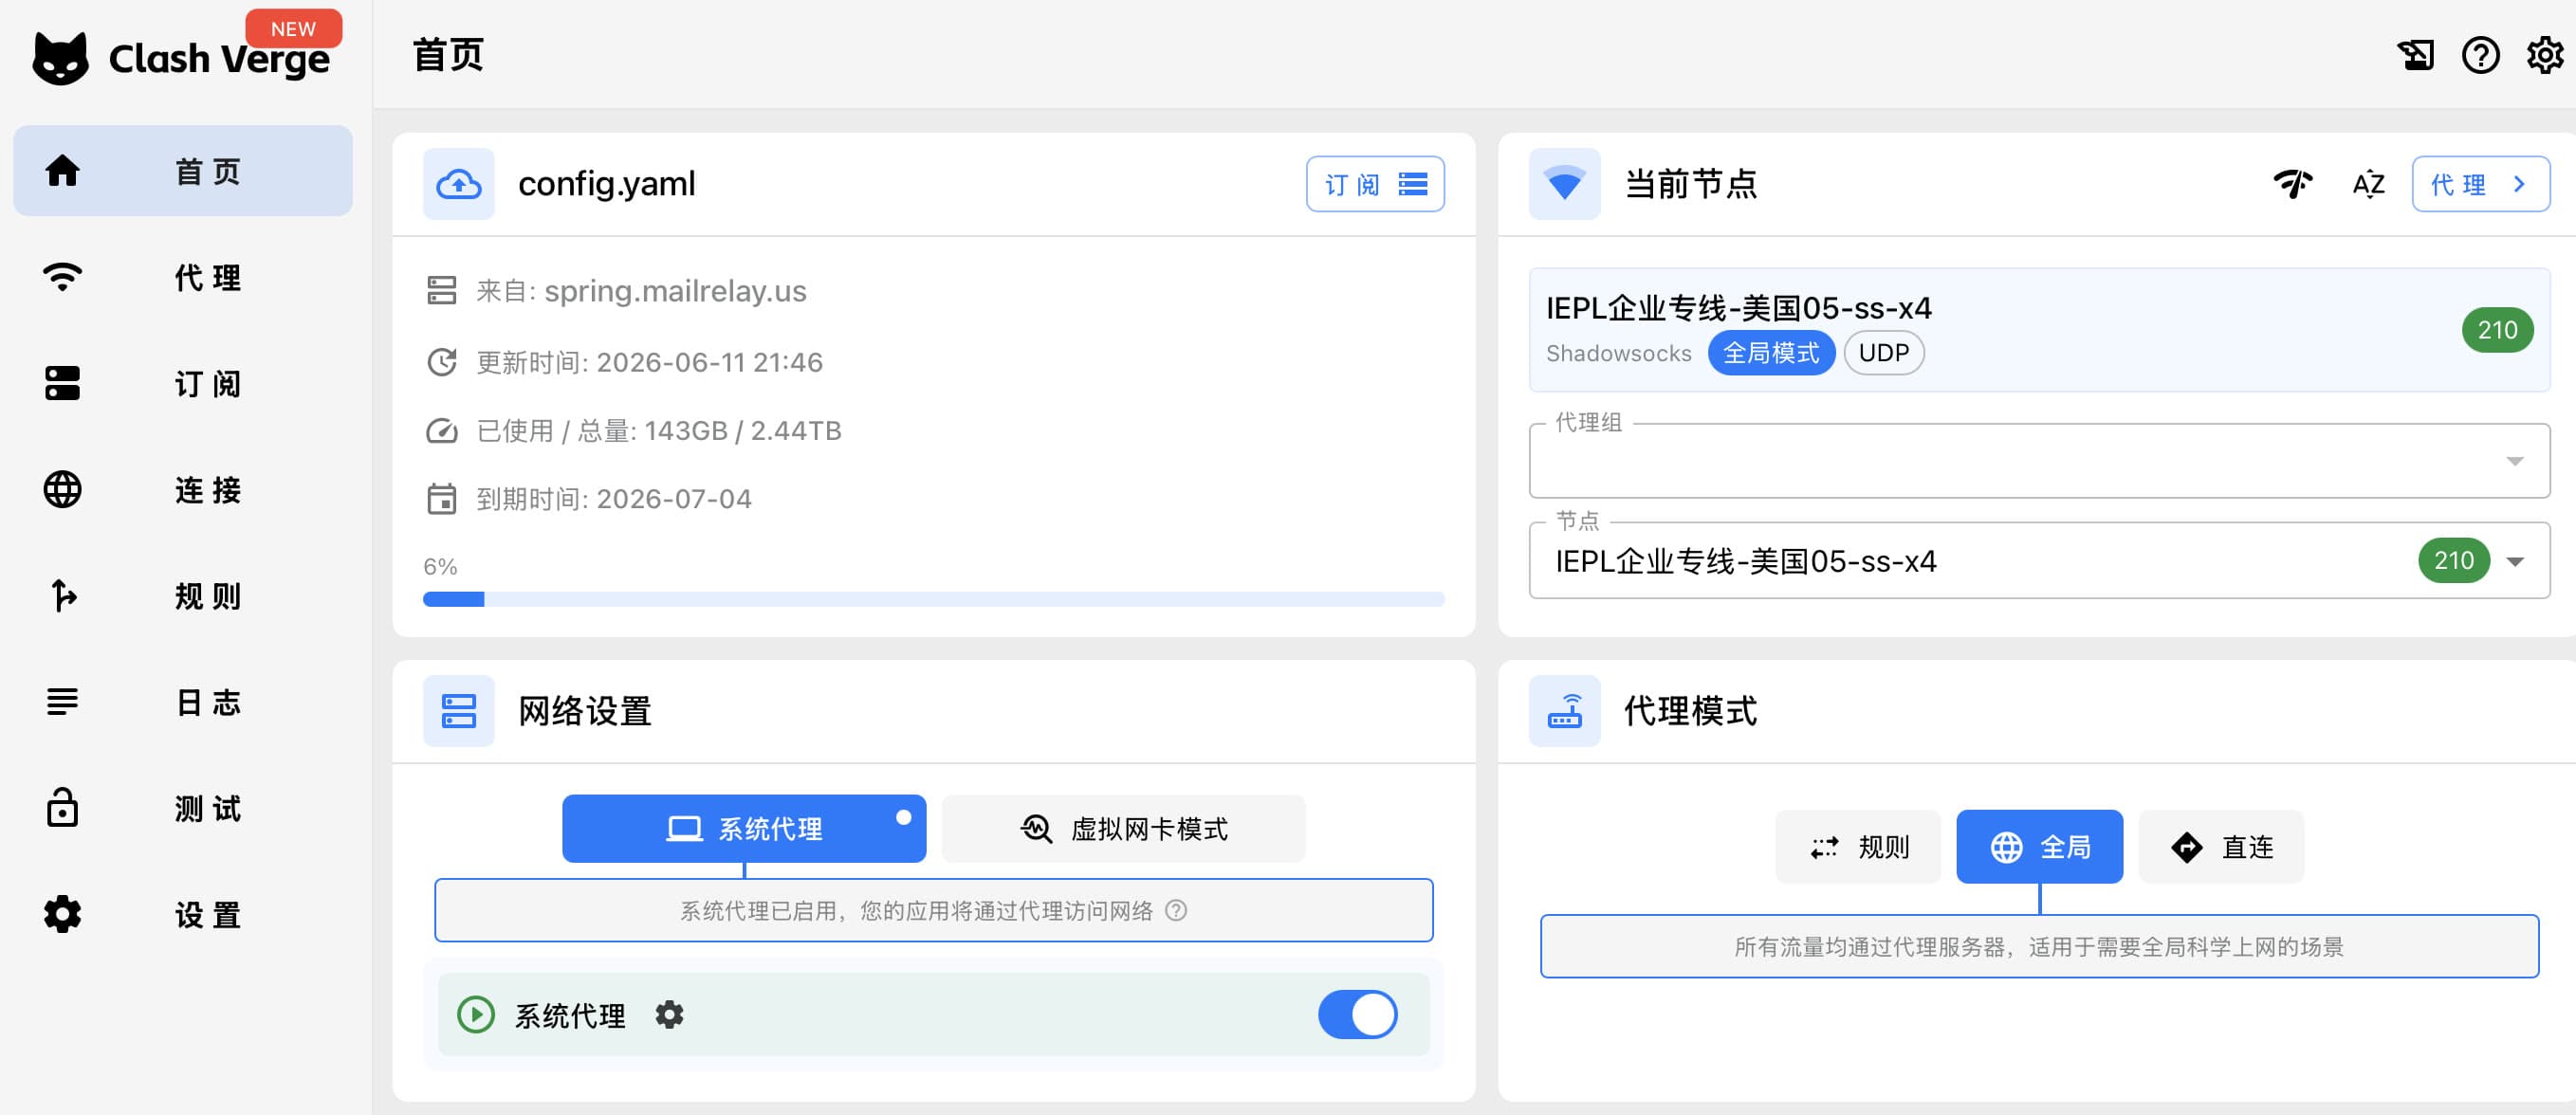
On the home page (首页), configure three things:
- System Proxy (系统代理) — turn this on so macOS routes app traffic through Clash. This is what makes browsers work.
- Proxy Mode (代理模式) — choose one:
- Rule (规则): traffic is routed based on rules — domestic sites go direct, blocked sites go through the proxy. Best for daily use.
- Global (全局): all traffic goes through the proxy.
- Direct (直连): nothing goes through the proxy.
- Current Node (当前节点) — pick a server node. Lower latency (the green number) is better.
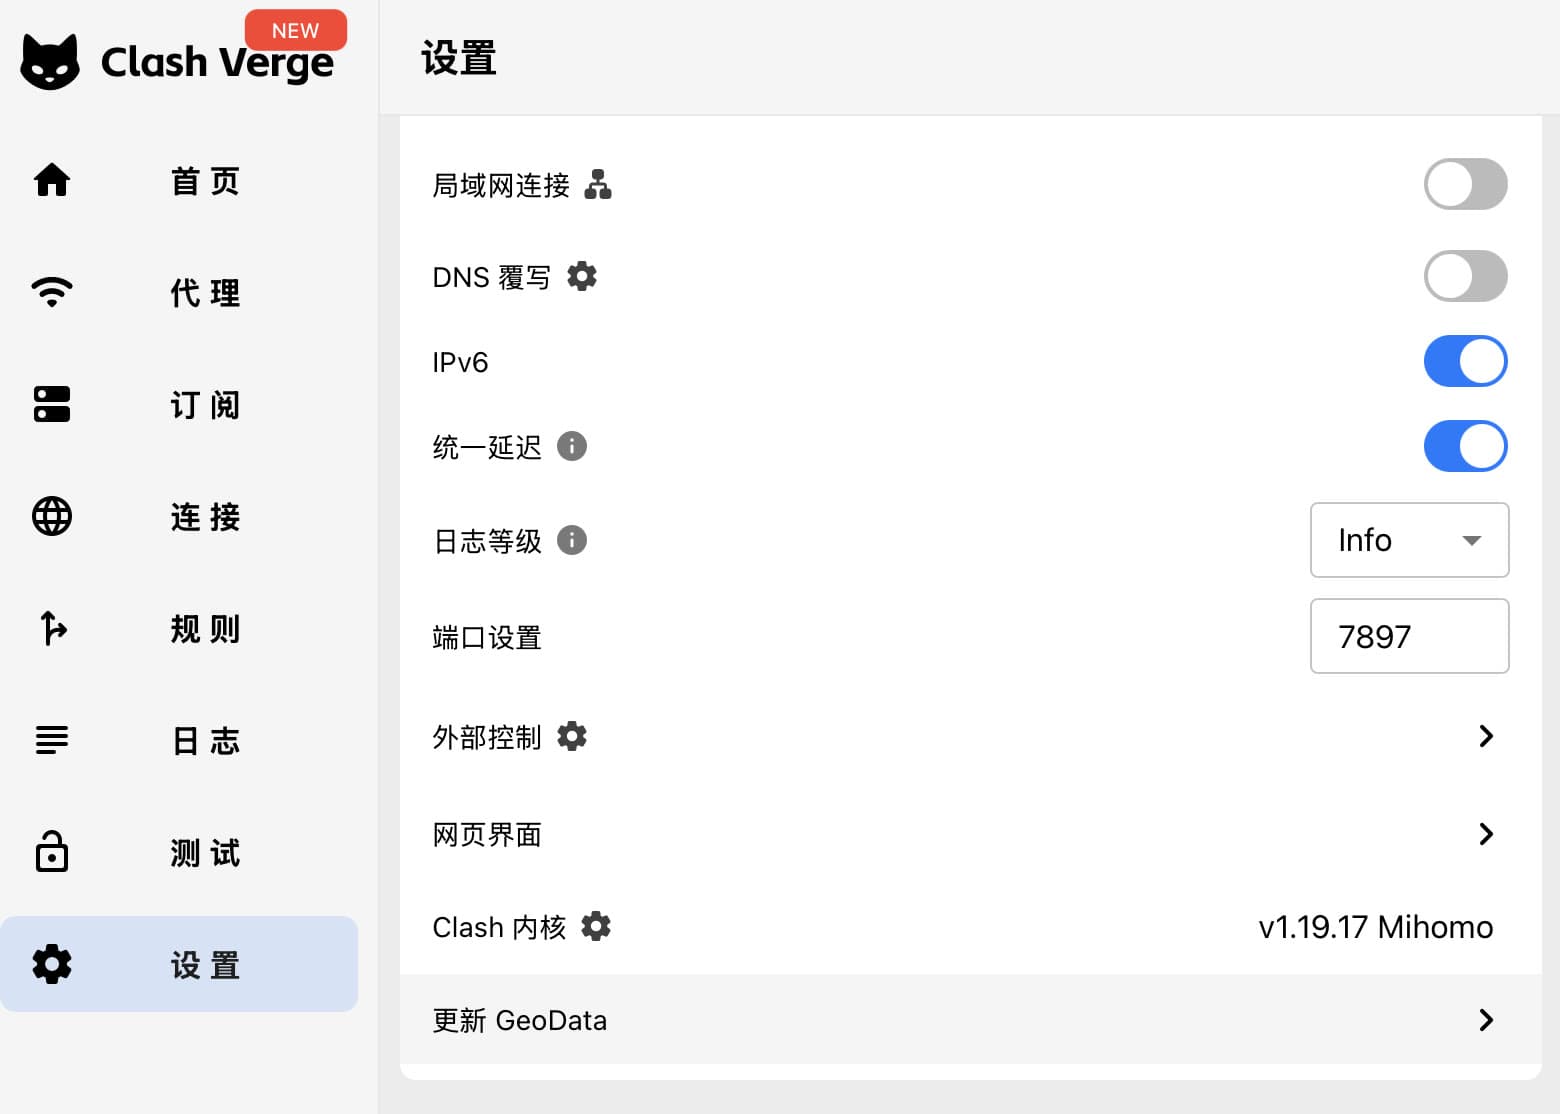
Check the Port
Go to Settings (设置) and note the Port (端口设置) — Clash Verge defaults to 7897 (older Clash clients used 7890). You'll need this for the terminal setup below.
At this point, browsers and most GUI apps work — verify by visiting a blocked site.
Route Terminal Traffic Through the Proxy
Enabling the system proxy does not affect most command-line tools: curl, git, pip, npm, etc. read proxy settings from environment variables, not from macOS system preferences. So your browser may work while git clone still hangs.
The fix is to set the proxy environment variables in your shell. Add these functions to ~/.zshrc:
proxyon() {
  export http_proxy=http://127.0.0.1:7897
  export https_proxy=http://127.0.0.1:7897
  export all_proxy=socks5://127.0.0.1:7897
  echo "proxy on"
}

proxyoff() {
  unset http_proxy https_proxy all_proxy
  echo "proxy off"
}
Make sure the port matches the one in Clash Verge's settings. Then reload your shell:
source ~/.zshrcNow you can toggle the proxy per terminal session with proxyon and proxyoff.
Test the Setup
Compare your public IP with the proxy off and on:
proxyoff
curl ifconfig.me      # shows your real IP

proxyon
curl ifconfig.me      # should show a different (foreign) IP
If the two IPs are different, your terminal traffic is going through Clash. If they're the same, the terminal isn't routing through the proxy — double-check that Clash Verge is running and the port number matches.
Note that the environment variables only apply to the current shell session — open a new terminal tab and you start with the proxy off, which is usually what you want: keep direct connections for speed and turn the proxy on only when a command needs it.
Make the Proxy Always On
If you find yourself typing proxyon in every new tab, flip the default: call it at the end of ~/.zshrc so every new shell starts proxied.
# auto-enable proxy in every new shell
proxyon
You can still run proxyoff in any individual tab when you need a direct connection — for example, to reach domestic sites faster or anything the proxy would slow down.
Proxy for Claudian in Obsidian
Obsidian is a GUI app, so it never inherits your shell's proxy variables — the Claudian plugin's Claude SDK calls will fail even when your terminal is proxied. Claudian has its own setting for this: go to Settings → Claudian → Environment → Custom variables and add:
HTTPS_PROXY=http://127.0.0.1:7897
HTTP_PROXY=http://127.0.0.1:7897
ALL_PROXY=socks5://127.0.0.1:7897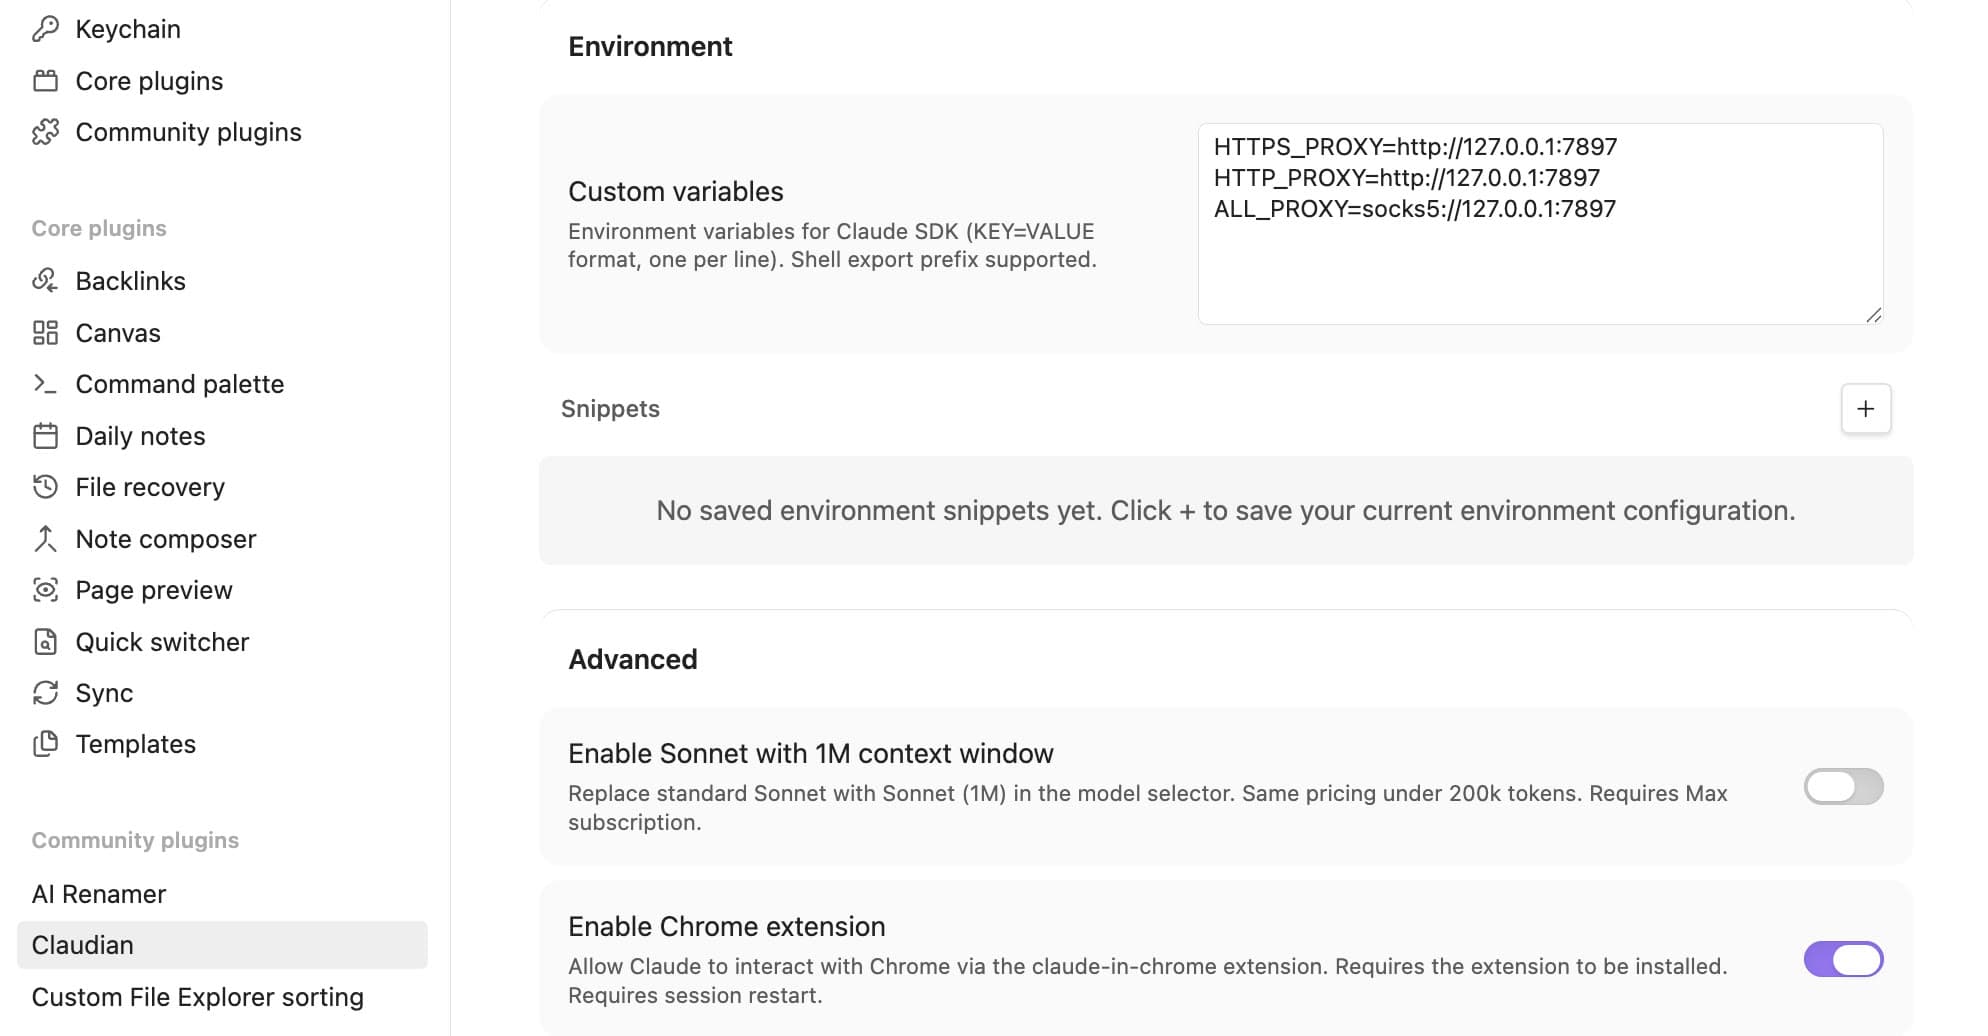
Note these are the uppercase forms — the Claude SDK reads those, unlike the lowercase ones most CLI tools use. Restart the Claudian session after saving for the variables to take effect.